IT4141

PORTFOLIO
Presented by:
SUPATTRA BOONTUA
IT4141

USERหน้าแดง คืออะไร
Userหน้าแดง คือ Userสำหรับสมาชิกภายในองค์กรของวัดพระธรรมกายทั้งพระ อุบาสก อุบาสิกา เจ้าหน้าที่และอาสาสมัครเพื่อให้เข้าใช้อินเตอร์เน็ตภายในองค์กร และเพื่อป้องกันบุคคลภายนอกเข้าถึงข้อมูล
ผ่านเครือข่ายอินเตอร์เน็ต เพื่อควาปลอดภัยขององค์กร
USER องค์กร (USERหน้าแดง)

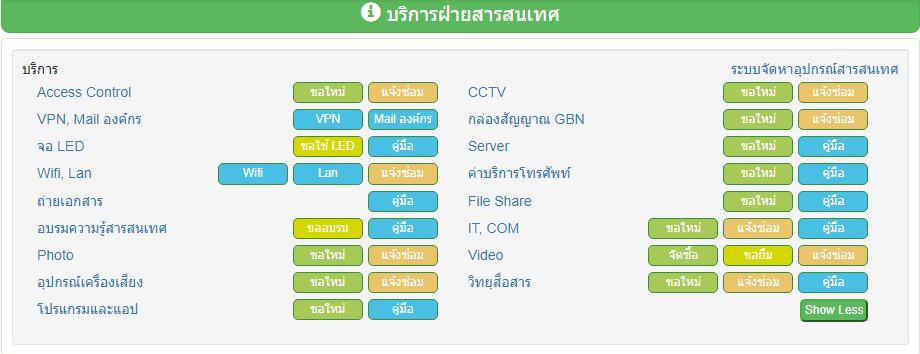


ขอ ACCOUNT ใหม่


ต่ออายุ
ACCOUNT
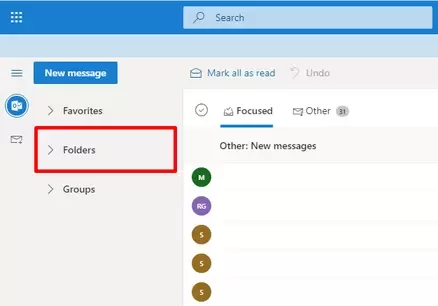
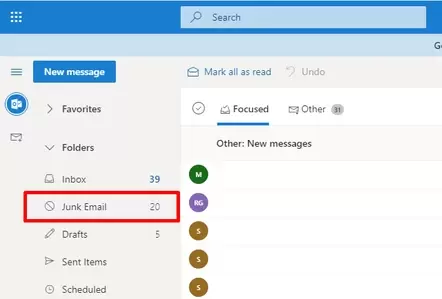
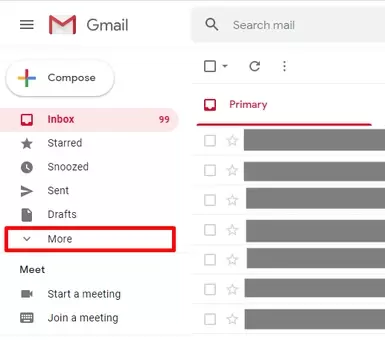
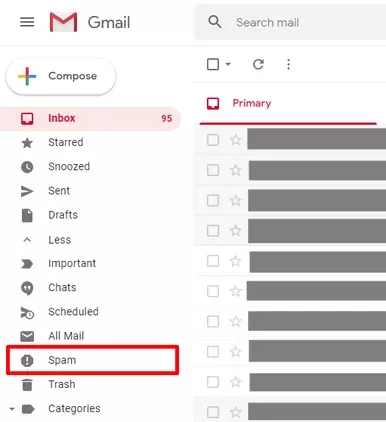
เช็คสถานะ
ACCOUNT
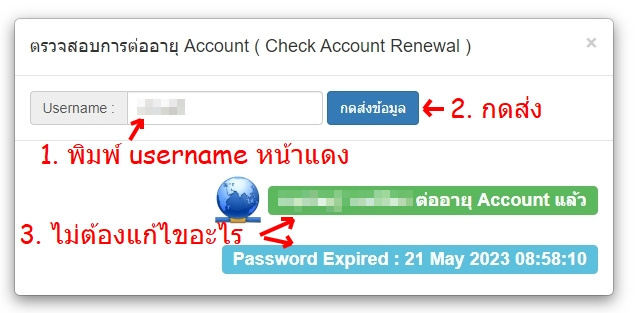
เช็คสถานะ Account หน้าแดง / รหัสผ่าน ด้วยตนเอง ที่

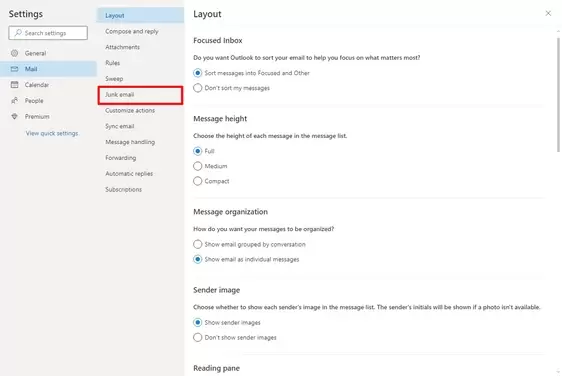
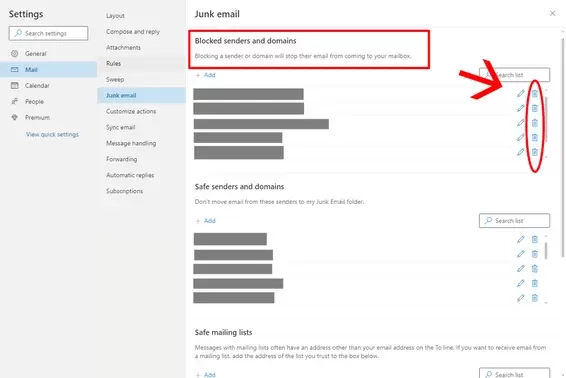
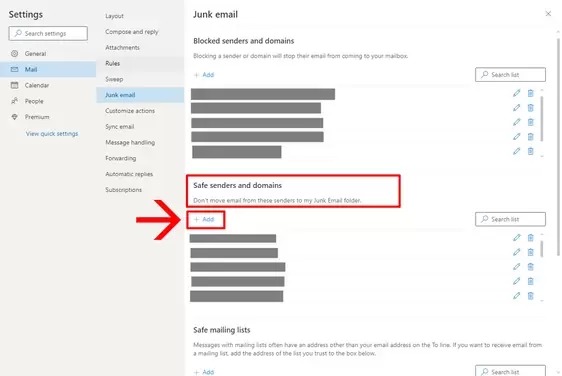
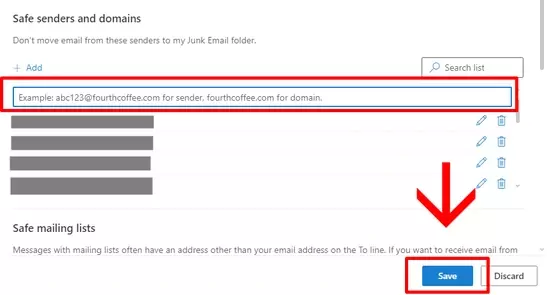
ภาพขั้นตอนการเช็ค

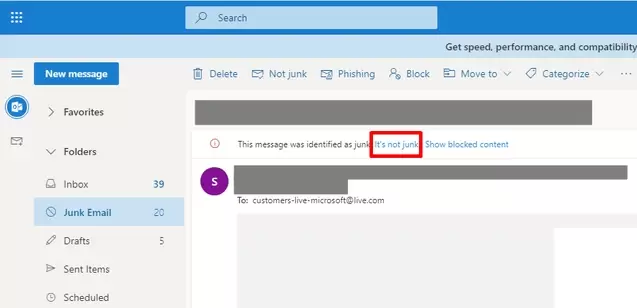
RESET รหัสผ่าน
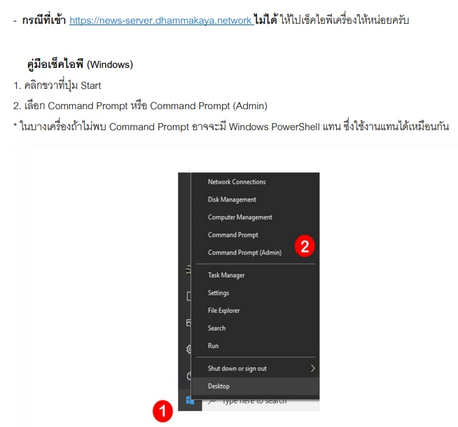
ปัญหา: จำรหัสผ่านไม่ได้ หรือรหัสผ่านหมดอายุ
1. เข้าไปรีเซ็ตรหัสผ่านได้ที่ลิ้งค์นี้
https://fdnet.dhammakaya.network/new_domain/
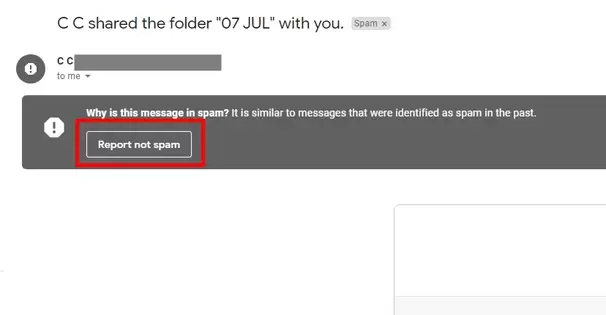
(หากไม่เจออีเมล์ที่ระบบส่งไปให้ กรุณาเช็คที่โฟลเดอร์อีเมล์ขยะ หรือ spam mail)
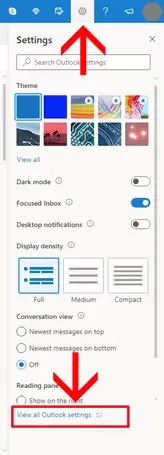
2. ลิ้งค์ภาพตัวอย่างขั้นตอน
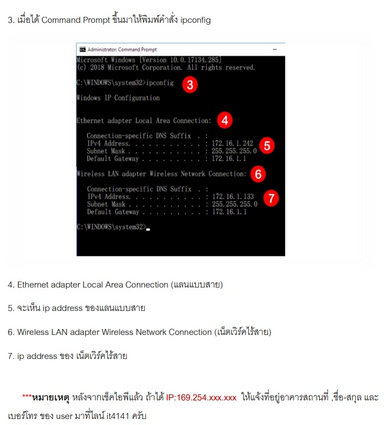
เช็ค ACCOUNT ตรวจโค้วต้า

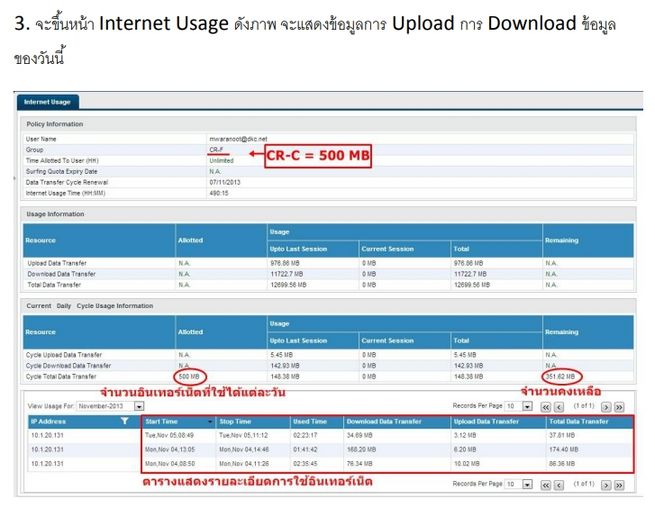
ภาพขั้นตอนการเช็ค
หน้าแดงไม่ขึ้น

รู้จัก SERVER ต่างๆ
1) news-server
2) ss100
3) pr-center
4) newpr
5) photoservice ( ต้อง Join Domain ก่อน )
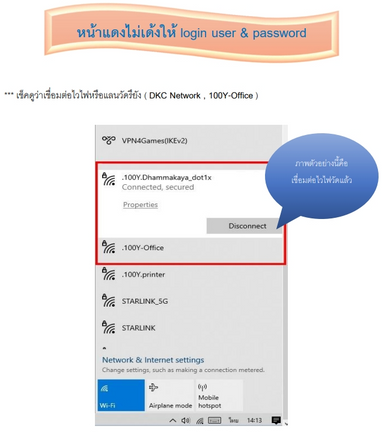
WIFI ในองค์กร
วิธีการใช้ WIFI
1) 100Y-Office
2) 100Y.Dhammakaya_dot1x
3) DKC Network
4) 100Yprinter
WIFI ในองค์กร
wifi ในองค์แบ่งตามพื้นที่ อาคาร100 ปี
- 100y-dhammakaya-dot1x
- 100y-office
- 100y-printer (ใช้แชร์ปริ้นเตอร์ )
wifi ในองค์แบ่งตามพื้นที่ 2000 ไร่
- สำนักงานใหญ่ : DKC-network (HQ)
- บุญรักษา : Boonraksa
- สภาฯ : DKC Network (Spha)
- วิหารคด : DKC Network (VHK)
- ปราบมาร : Prabman-Zoom-24HR
- อุบาสิกา : DKC-network
- 58 ไร่ : DKC-network


CONTACT US
02-831-1441, 082-782-7733, 082-782-7744
noc@dhammakaya.center
https://fdnet.dhammakaya.network
กองบริการสารสนเทศ อาคาร 100 ปีฯ ตึก 0 ชั้น 11 วัดพระธรรมกาย
IT4141
THANK
YOU
noc@dhammakaya.center